| Line 1: | Line 1: | ||
| − | Nuaj' [''nu-a-j'''] is my little .Net renderer for DirectX 10. It's quite small and really easy to use. Source code is available as a [ | + | Nuaj' [''nu-a-j'''] is my little .Net renderer for DirectX 10. It's quite small and really easy to use. Source code is available as a [https://github.com/Patapom/NuajFramework GIT repository] and it's free. [[File:S2.gif]] |
Make sure to also check [[Cirrus]], the companion high-level module for Nuaj'. | Make sure to also check [[Cirrus]], the companion high-level module for Nuaj'. | ||
Latest revision as of 13:57, 7 September 2013
Nuaj' [nu-a-j'] is my little .Net renderer for DirectX 10. It's quite small and really easy to use. Source code is available as a GIT repository and it's free. ![]()
Make sure to also check Cirrus, the companion high-level module for Nuaj'.
It's now using SharpDX by Alexandre Mutel, a .Net wrapper that tightly wraps DirectX for use into .Net managed code (Nuaj' was previously using SlimDX, which was really great too but larger in size and more annoying for some matters).
Also, it was created with Visual Studio 2010 and .Net Framework 4.0 so make sure you have that !
Update: The example meshes and textures are now quite huge so make sure you have a lot of room on your hard drive (like 2Gb) and please be patient with the SVN checkout !
The main idea behind Nuaj is to "make my life easier", not to create the ultimate renderer that washes dishes and serves coffee. Those are never finished and you always come up with a bad surprise once it's time to use it (providing that you reach that point).
So I decided to create first a set of basic helpers to manage my stuff. Basically, all I need is to create geometry easily using vertices and/or indices, I need to create materials from shaders that compile either from memory or from file, I need to create textures and render targets to feed my shaders and rendering pipeline, tie all this together and roll the dice...
Just so you see how easy it is to write your own demo with Nuaj (and so you will want to read on to the end of that page), here is the basic code you'll have to write to render a textured cube (I skipped the shader code here) :
// Create the cube material
m_CubeMaterial = new Material<VS_P3C4T2>( m_Device, "CubeMaterial", new System.IO.FileInfo( "./FX/CubeShader.fx" ) );

// Create the cube primitive
VS_P3C4T2[]	Vertices = new VS_P3C4T2[]
{
 new VS_P3C4T2() { Position=new Vector3( -1.0f, -1.0f, -1.0f ), Color=new Vector4( 0.0f, 0.0f, 0.0f, 1.0f ), UV=new Vector2( 0.0f, 0.0f ) },
 new VS_P3C4T2() { Position=new Vector3( +1.0f, -1.0f, -1.0f ), Color=new Vector4( 1.0f, 0.0f, 0.0f, 1.0f ), UV=new Vector2( 1.0f, 0.0f ) },
 new VS_P3C4T2() { Position=new Vector3( +1.0f, +1.0f, -1.0f ), Color=new Vector4( 1.0f, 1.0f, 0.0f, 1.0f ), UV=new Vector2( 1.0f, 1.0f ) },
 new VS_P3C4T2() { Position=new Vector3( -1.0f, +1.0f, -1.0f ), Color=new Vector4( 0.0f, 1.0f, 0.0f, 1.0f ), UV=new Vector2( 0.0f, 1.0f ) },
 new VS_P3C4T2() { Position=new Vector3( -1.0f, -1.0f, +1.0f ), Color=new Vector4( 0.0f, 0.0f, 1.0f, 1.0f ), UV=new Vector2( 0.0f, 0.0f ) },
 new VS_P3C4T2() { Position=new Vector3( +1.0f, -1.0f, +1.0f ), Color=new Vector4( 1.0f, 0.0f, 1.0f, 1.0f ), UV=new Vector2( 1.0f, 0.0f ) },
 new VS_P3C4T2() { Position=new Vector3( +1.0f, +1.0f, +1.0f ), Color=new Vector4( 1.0f, 1.0f, 1.0f, 1.0f ), UV=new Vector2( 1.0f, 1.0f ) },
 new VS_P3C4T2() { Position=new Vector3( -1.0f, +1.0f, +1.0f ), Color=new Vector4( 0.0f, 1.0f, 1.0f, 1.0f ), UV=new Vector2( 0.0f, 1.0f ) },
};
int[]	Indices = new[] {
 0, 2, 1,
 0, 3, 2,
 4, 5, 6,
 4, 6, 7,
 0, 4, 7,
 0, 7, 3,
 1, 6, 5,
 1, 2, 6,
 0, 1, 5,
 0, 5, 4,
 3, 7, 6,
 3, 6, 2
};

m_Cube = new Primitive<VS_P3C4T2,int>( m_Device, "Cube", PrimitiveTopology.TriangleList, Vertices, Indices, m_CubeMaterial );

// Create the cube diffuse texture
Image<PF_RGBA8>	DiffuseImage = new Image<PF_RGBA8>( m_Device, "Diffuse", Properties.Resources.TextureBisou );  // Here you can provide any kind of Bitmap

m_CubeDiffuseTexture = new Texture2D<PF_RGBA8>( m_Device, "Diffuse Texture", DiffuseImage, 1, true );
And the rendering code goes like this :
// Clear
m_Device.ClearRenderTarget( m_Device.DefaultRenderTarget, Color.CornflowerBlue );
m_Device.ClearDepthStencil( m_Device.DefaultDepthStencil, DepthStencilClearFlags.Depth, 1.0f, 0 );

// Draw
m_Cube.Render();

// Show !
m_Device.Present();
Contents
Helpers
All helpers in Nuaj derive from a base Component class that takes a Device and a Name as basic parameters for construction.
- Device, the Device helper is a singleton and wraps the DX10 Device. It contains a swap chain and a back buffer (the default render target). The standard DirectX Device methods are rewired through that new Device class.
Basically, nothing fancy here, you just create your Device with specific parameters and call "ClearRenderTarget()" and "Present()" to run the show. The Device is the first parameter needed for every other component type in Nuaj so make sure it's created first.
- Material, the Material helper is really neat ! It's a template against a Vertex Structure and compiles a shader from a string, a byte[] or from a file.
In the latter case, it automatically watches the file for changes so your shader is recompiled every times the file changes (ideal for debugging !). It also supports a default "Error Shader" when your shader fails to compile. The material also supports what I call "Shader Interfaces" (more on that here) which are reeeaaally useful !
- VertexBuffer, this wraps an old-style VertexBuffer (VB) and accepts creation from a bunch of vertices that are organized as an array of Vertex Structures. This type is also a template against Vertex Structures and only a VertexBuffer with vertices compatible with the vertex structure used by a material can be used to render with that material.
It contains a "Draw()" method that will render a non-indexed primitive using the vertices stored by the VB.
- IndexBuffer, this wraps an old-style IndexBuffer (IB) and accepts creation from a bunch of Indices that are organized as an array of shorts, ushorts, ints or uints.
It contains a "Draw()" method that will render an indexed primitive using the indices stored by the IB.
- Primitive, this is simply a helper that gathers a VertexBuffer and a Material, and also an optional IndexBuffer.
It contains a "Draw()" method that will render the primitive using the specified Material and that will draw either an indexed primitive if an IndexBuffer exists or a non-indexed primitive otherwise. Typically, scenes exported from a 3D package should create a bunch of Primitives for their objects, each should then render in turn. NOTE: Materials can be assigned to multiple primitives, there are no restrictions on that.
- Image, this is not basically a DirectX component per-se but rather a helper to load and convert standard LDR or HDR images into a "DataRectangle", which is then readable by a texture.
An Image is a template against Pixel Formats so that it can be created to match a specific DirectX pixel format.
- CubeImage, this is a collection of 6 Images that represent the 6 faces of a cube. It can then be fed to a Texture2D to build a cube map.
- Texture2D, this wraps a 2D readonly texture (i.e. what DirectX calls "immutable" resource) or texture array.
These textures are readonly from the GPU and not accessible by the CPU at all. They are the most common texture types for rendering and must be provided with initial data (i.e. an Image or a CubeImage) at the time of creation, there is no delay-loading of these ones. A Texture2D is a template against Pixel Formats so that it can be created to match a specific DirectX pixel format. It must be built using images that have the same Pixel Format.
- RenderTarget, this wraps a 2D read/write texture (i.e. what DirectX calls "default" resource) that is also able to be rendered to.
These textures are also fairly common to perform "render to texture" operations and can be bound either as input for the shader or as an output render target for the pipeline. They are not accessible by the CPU at all (in fact, they are but who cares ?). A RenderTarget is a template against Pixel Formats so that it can be created to match a specific DirectX pixel format. It must be built using images that have the same Pixel Format.
- Image3D, Texture3D, RenderTarget3D, are the 3D equivalent of the above components.
- Camera, this is not a DirectX component at all but it regroups a camera transform matrix and a projection matrix that you can feed directly to your shader to transform an object correctly.
It also contains several helpful methods to drive the camera around and initialize it correctly, plus a Frustum geometric objet that is used for simple culling.
Vertex Structures
Vertex structures are types that need to be used as templates for Materials and VertexBuffers. They are directly mapped to vertex shader input layouts.
There are already a couple of them pre-defined in Nuaj so you don't really need to create new ones unless you need a very specific type of vertex declaration.
They must be built using the following pattern :
[StructLayout( LayoutKind.Sequential )]
public struct	VS_PositionColorTexture
{
 [Semantic( "POSITION" )]
 public Vector3		Position;
 [Semantic( "COLOR" )]
 public Vector4		Color;
 [Semantic( "TEXCOORD0" )]
 public Vector2		UV;
}
Notice the [Semantic()] attribute that must be associated to each field and must correspond exactly to the semantic you use in your vertex shader input declaration. Semantics are automatically resolved by the Material at shader compilation time.
Also, the supported types for the fields of Vertex Structures are :
- float, Vector2, Vector3 and Vector4, which are automatically resolved as float, float2, float3 and float4 on shader side
- Color3, Color4, which are automatically resolved as float3 and float4 on shader side
- Matrix, which are automatically resolved as Matrix4x4 on shader side
Pixel Formats
A PixelFormat structure represents a single pixel and they all implement the IPixelFormat interface that serves to write pixels with LDR or HDR values. Images and Textures should use PixelFormat structures as template types.
There are already a couple of them pre-defined in Nuaj so you don't really need to create new ones unless you need a very specific type of pixel declaration.
Pixel formats structures all contain fields that must match an existing DirectX format. An example of such pixel format is the PF_RGBA8 :
[StructLayout( LayoutKind.Sequential )]
public struct	PF_RGBA8 : IPixelFormat
{
 public byte	B, G, R, A;

 // IPixelFormat interface
 public Format DirectXFormat  { get { return Format.R8G8B8A8_UNorm; } }
 public void Write( byte _R, byte _G, byte _B, byte _A )  { R = _R; G = _G; B = _B; A = _A; }
 public void Write( Vector4 _Color )
 {
  R = PF_Empty.ToByte(_Color.X);
  G = PF_Empty.ToByte(_Color.Y);
  B = PF_Empty.ToByte(_Color.Z);
  A = PF_Empty.ToByte(_Color.W);
 }
}
Shader Interfaces
Among the cool stuff Nuaj helps you do, there is a very helpful feature called the Shader Interfaces.
The basic idea is to associate a fixed set of shader semantics to an "interface". All shaders that have that set of semantics are said to implement the interface.
On the C# side, we declare the shader interfaces by telling which semantics it should look for and register such interfaces through the Device object.
Materials (and their shaders) are then checked against all existing interfaces when they are created (or when the shader is recompiled) and expose a set of interfaces they support.
Then, you simply have to create some InterfaceProviders that support a given interface and that are able to provide data for it.
These providers are then called for each material and assign their data to the material's shader at runtime.
Some providers are registered globally for the application, some others can be registered for a single rendering pass while others can register per-object. Registering a new provider for an interface overrides any existing one, thus more specific providers can take over more general ones.
This is a really powerful mechanism that helps a lot to automatically feed the shaders with the proper data.
Here is a really simple example :
- Shader Side :
// Let's say the WORLD2PROJ semantic represents the "IProjectable" interface
float4x4 World2Proj : WORLD2PROJ;

VS_OUT VS( VS_IN _In )
{
  VS_OUT Out;
  Out.Position = mul( _In.Position, World2Proj );  // Projects a WORLD position...
  return Out;
}
- C# Side :
// Declare a new interface type (done at application initalization time)
public class	IProjectable : ShaderInterfaceBase
{
 [Semantic( "WORLD2PROJ" )]
 public Matrix		World2Proj	{ set { SetMatrix( "WORLD2PROJ", value ); } }
}

// Register it
Device.DeclareShaderInterface( typeof(IProjectable) );

// Create a new provider class for that interface (it only takes to implement the IShaderInterfaceProvider)
class MyProvider : IShaderInterfaceProvider
{
 public void ProvideData( IShaderInterface _Interface )
 {
  (_Interface as IProjectable).World2Proj = SomeProjectionMatrix;
 }
}

// Register the new provider for the IProjectable interface (done at provider object creation time)
Device.RegisterShaderInterfaceProvider( typeof(IProjectable), new MyProvider() );
Note : The Camera helper already implements such a provider.
Now, if you understood the principle but don't see the benefits, just imagine a shader code that includes a shader interface for shadow maps (this interface is complete with the WORLD => SHADOW matrix and the Shadow Map Texture2D as well as a function to compute shadowing of a given World position).
So basically you get that kind of shader code :
#include "ShadowMapSupport.fx"  // In that file are the variables and semantics necessary to use a shadow map

float4 PS() : COLOR
{
 (do some things that use shadows)
}
Then your shader will automatically be provided with the appropriate data for shadow mapping without you having anything to do on the C# side ! Isn't it cool ?
.Net Subtlety
If you create a new application from scratch and wish to use SlimDX, make sure to edit you app.config file and change from these lines :
   <?xml version="1.0"?>
   <configuration>
    <startup>
     <supportedRuntime version="v4.0" sku=".NETFramework,Version=v4.0"/>
    </startup>
   </configuration>
to these ones so you can use backward compatible assemblies :
   <?xml version="1.0"?>
   <configuration>
    <startup useLegacyV2RuntimeActivationPolicy="true">
     <supportedRuntime version="v4.0" sku=".NETFramework,Version=v4.0"/>
    </startup>
   </configuration>
Basic Examples
Silhouetted Parallax Mapping
Here are some basic examples to demonstrate the possibilities available through Nuaj :
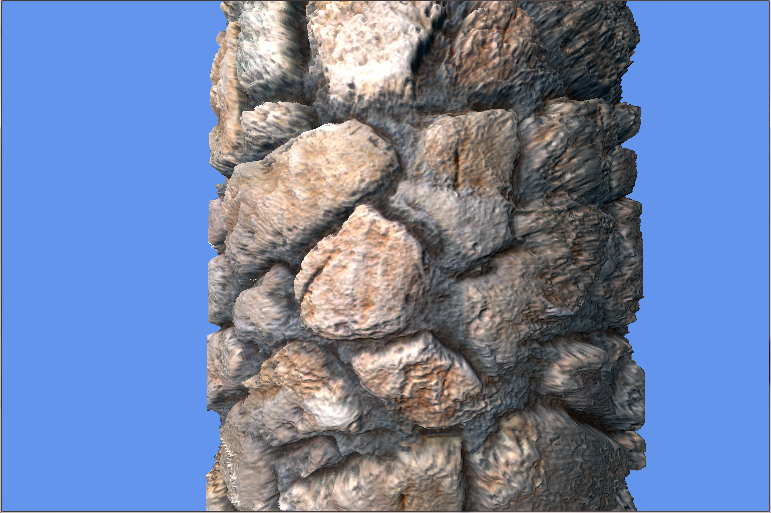
Some advanced parallax occlusion mapping (POM ![]() ) with silhouette extrusion :
) with silhouette extrusion :
Custom Alpha2Coverage Resolve
4xMSAA Alpha to coverage demonstration using custom resolve (i.e. I added a screen-space noise to enhance the aspect of the alpha2coverage, otherwise the default resolve shows nasty banding) :
3D Water
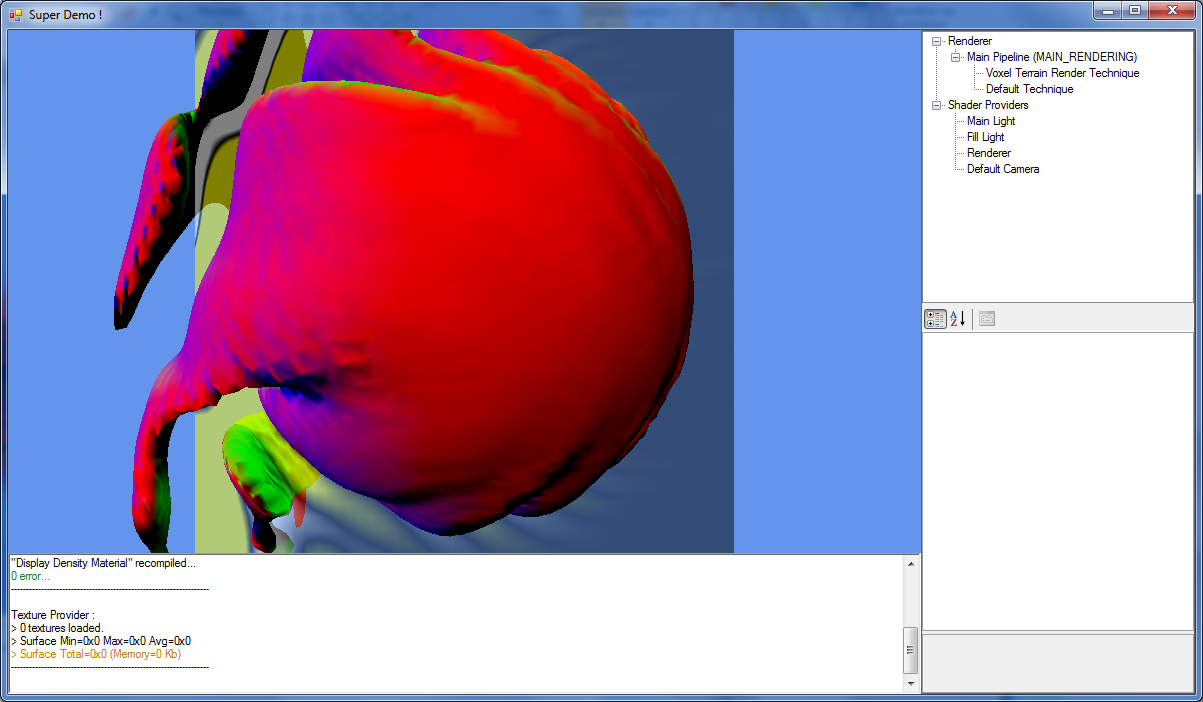
A 3D adaptation of the classical "water effect" by Iguana (Heartquake, 1994) using meta-balls and 3D textures :
Advanced Rendering
Nuaj' is really cool to prototype small rendering projects, several demo apps are provided with it so you can quickly setup basic projects.
If you wish to achieve better and more complex rendering though, you may check out the higher level Nuaj wrapper called Cirrus that helps you render complex scenes loaded from 3D packages like 3DS Max and Maya.
Sequencing
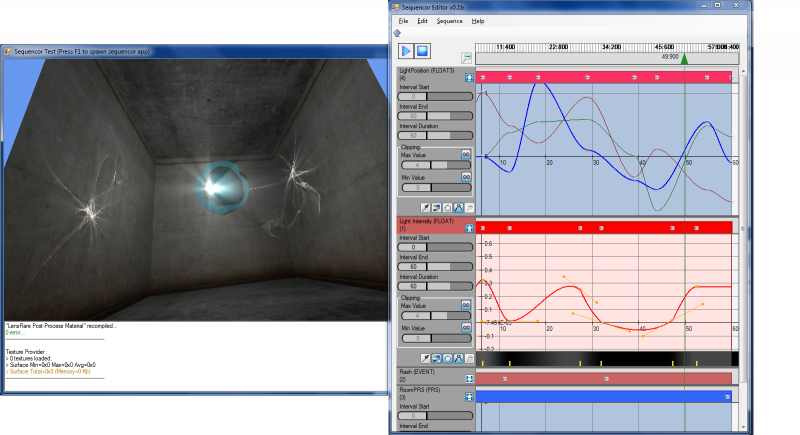
Nuaj' is now the proud owner of its very own sequencer ! ![]()
This sequencer allows you to animate and tweak various parameter types :
- BOOL, true/false values
- EVENT, events that are triggered when the sequencer passes the event keys
- INT, integer values
- FLOAT, FLOAT2, FLOAT3, FLOAT4, scalar and vector floats
- PRS, Position/Rotation/Scale keys (individual or altogether)
The frontend can be spawned in standalone or embedded into Nuaj' where it's then able to sample parameter values in real time (like, move the camera and sample its matrix for a PRS key).
It can either use its own internal timer or use an external time you will provide (e.g. the music's position) for sequencing.


